Upgrading brakes
Page 1 of 1
 Upgrading brakes
Right, here is a guide for people who want to upgrade their brakes from 247 to 266, 266 to 283 or 247 to 283 may be slightly different as I donít know what the 283 brakes look like, however this gives a very good general idea as to what to do. The only difference would be the size of the bolts or fixings possibly.
First off jack up the car and take off the wheel, axel stands are an advisory. If you require pictures to show you how to do any of these things please close this page, walk outside, get in your car and take it to the local garage to let them do it for you.
This is what you will be faced with when you take off the wheel
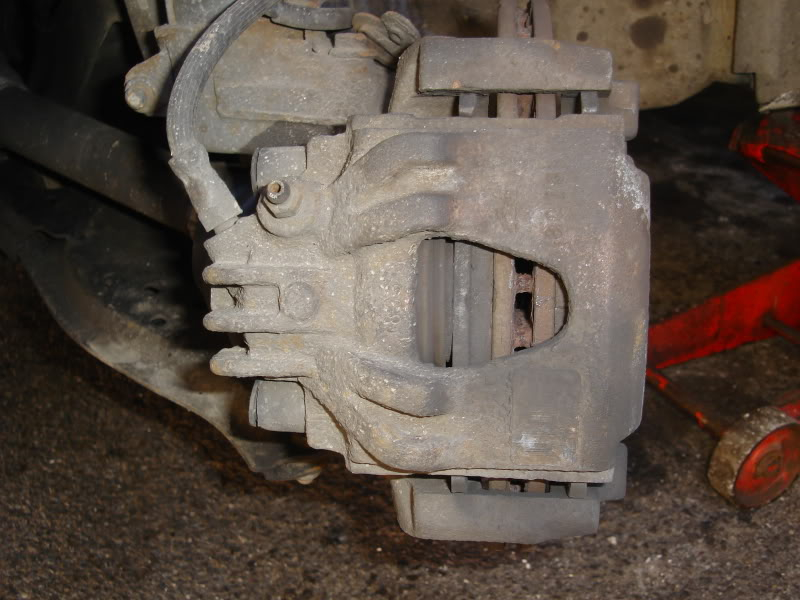
Prise off this spring either with a pry-bar or a long screwdriver,
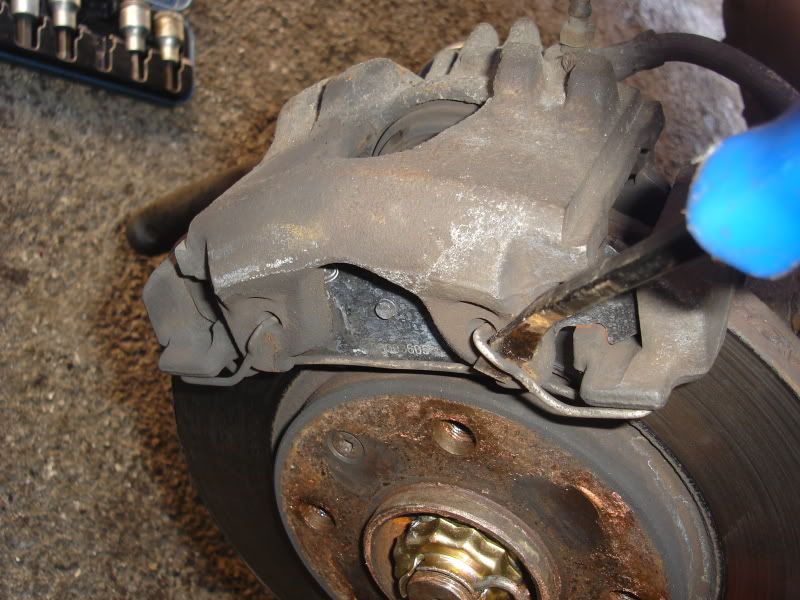
You will need to take off these bolts, these are 14mm Allen key bolts and shouldnít be too tight. There may be plastic covers over these bolts, these will just need prying off. There are two bolts, one top one bottom. You will then be able to simply lift off the calliper.

With the calliper off you will be able to get to the carrier, this is held on by two 19mm bolts (If you have lost your 19mm socket, try looking on the end of your wheel brace), remove both of these

Then you need a Torx piece to remove the disc, bear in mind these might not be on your disc, itís not essential but they make putting wheels back on much easier. (these may be seized on and will need drilling off- so make sure you have a sharp drill to hand or available to borrow.)
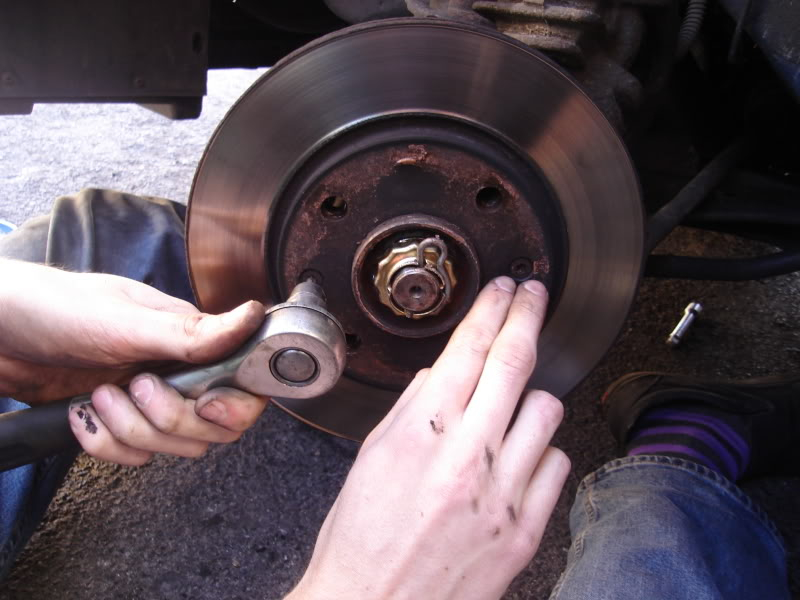
Put a drop of copa-slip on your hub to stop the brake disc from sticking, again not essential but will save on any hammering the next time you want to remove the discs

You will need a spanner to loosen the brake line from the calliper. Bear in mind this is going to be VERY tight, you might need some assistance in holding the calliper. Take great care not to rip the brake line or you will be in the words of Colin Farrell Ė F*cked.
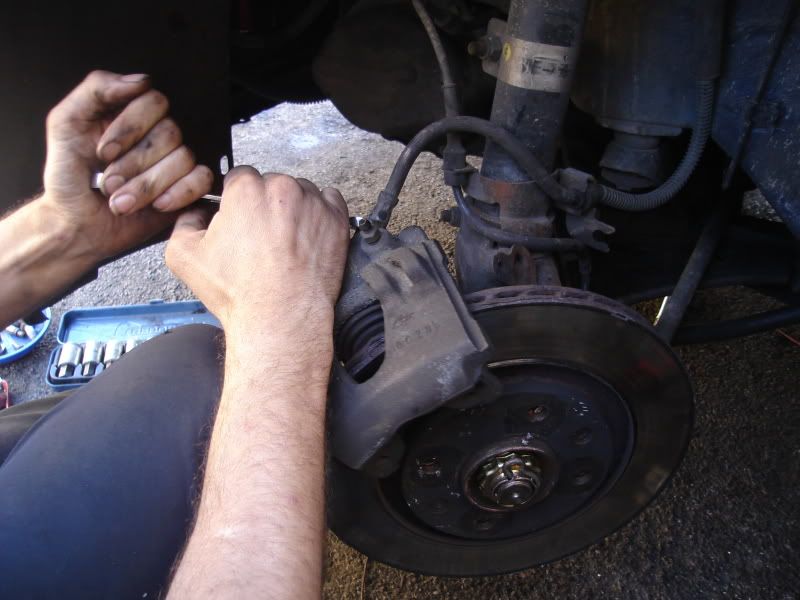
When you have loosened the line off, make sure you have the new calliper to hand, twist the calliper to remove it from the line, watch out brake fluid will start to pour out Ė this is corrosive to paint so be very careful where it goes. Make sure you donít damage the line and quickly as possible grab the new calliper and put it on by twisting it onto the brake line. Tighten it up with a spanner as well.
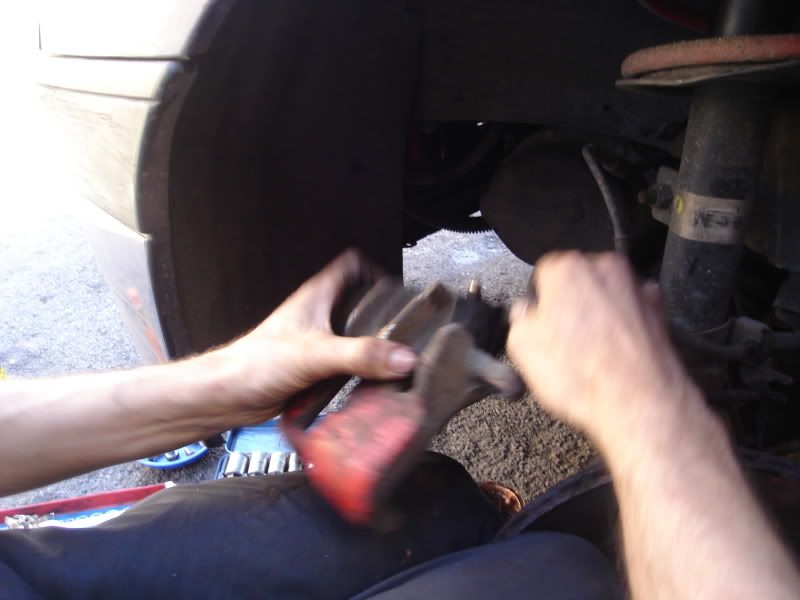

Place the calliper on the strut and leave it rest there for a minute. Grab the new carrier and re-fit it to the hub the same way you removed the old one. Copa-slip up the back of the outer brake pad and place it in the carrier like so
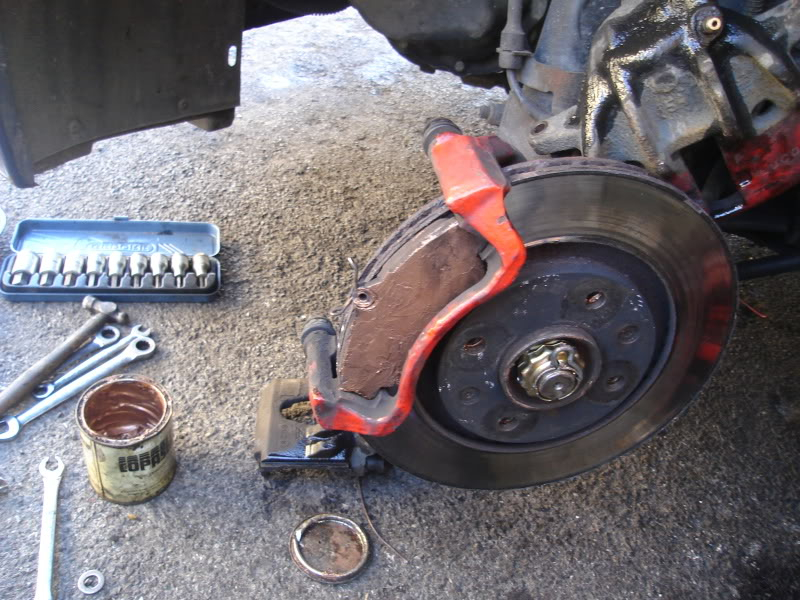
Place the inside brake pad into the calliper which is resting on the strut. Re-fit the same way you removed it.
You will then need to bleed the brakes, this will take 2 people to do. Surprisingly if you go to Halfords you can get all the bits you need and they will tell you how to do it. Or you can get an easy-bleed, which costs more but can be done on your own.
Re-fit the wheel and take it for a quick drive, the brakes will need to bed in a little bit so donít go driving like a tw*t just yet.
That will be all.
First off jack up the car and take off the wheel, axel stands are an advisory. If you require pictures to show you how to do any of these things please close this page, walk outside, get in your car and take it to the local garage to let them do it for you.
This is what you will be faced with when you take off the wheel

Prise off this spring either with a pry-bar or a long screwdriver,

You will need to take off these bolts, these are 14mm Allen key bolts and shouldnít be too tight. There may be plastic covers over these bolts, these will just need prying off. There are two bolts, one top one bottom. You will then be able to simply lift off the calliper.

With the calliper off you will be able to get to the carrier, this is held on by two 19mm bolts (If you have lost your 19mm socket, try looking on the end of your wheel brace), remove both of these

Then you need a Torx piece to remove the disc, bear in mind these might not be on your disc, itís not essential but they make putting wheels back on much easier. (these may be seized on and will need drilling off- so make sure you have a sharp drill to hand or available to borrow.)

Put a drop of copa-slip on your hub to stop the brake disc from sticking, again not essential but will save on any hammering the next time you want to remove the discs

You will need a spanner to loosen the brake line from the calliper. Bear in mind this is going to be VERY tight, you might need some assistance in holding the calliper. Take great care not to rip the brake line or you will be in the words of Colin Farrell Ė F*cked.

When you have loosened the line off, make sure you have the new calliper to hand, twist the calliper to remove it from the line, watch out brake fluid will start to pour out Ė this is corrosive to paint so be very careful where it goes. Make sure you donít damage the line and quickly as possible grab the new calliper and put it on by twisting it onto the brake line. Tighten it up with a spanner as well.


Place the calliper on the strut and leave it rest there for a minute. Grab the new carrier and re-fit it to the hub the same way you removed the old one. Copa-slip up the back of the outer brake pad and place it in the carrier like so

Place the inside brake pad into the calliper which is resting on the strut. Re-fit the same way you removed it.
You will then need to bleed the brakes, this will take 2 people to do. Surprisingly if you go to Halfords you can get all the bits you need and they will tell you how to do it. Or you can get an easy-bleed, which costs more but can be done on your own.
Re-fit the wheel and take it for a quick drive, the brakes will need to bed in a little bit so donít go driving like a tw*t just yet.
That will be all.
Last edited by AlexJ on Mon 13 Apr 2009, 03:07; edited 7 times in total
Page 1 of 1
Permissions in this forum:
You cannot reply to topics in this forum


